For the last day of “E” week, I have a special treat for you all! My co-worker Andy Baggarly is here to share some his special secrets to roasting your own coffee beans. I had the pleasure of getting to know “Baggs” a little better during my two-week stint in Arizona for Spring Training. Not only is he a big foodie like me, but he’s very serious about his coffee. So much so, that he packs up his roaster and espresso machine to have with him for the six weeks in the desert. I’ll let him take it from here…
~~~~~
Hi everyone! I’m very, very excited to share my love of espresso here on E is for Eat, and I mean it. I’m very, very, very, VERY excited.
(On a related note, it was harder than I thought to pour latte art and take pictures at the same time. So I ended up drinking five double-shot cappuccinos. Did I mention I was very excited?)
We’re lucky to live in San Francisco, home to some of the best coffee in the world. You’ve got Blue Bottle, Ritual and Four Barrel. You’re not far from Portland, home of Stumptown. A lot of people swear by Philz for its dizzying selection of pour-overs. And of course, Berkeley is home to Peet’s. But you can get super high-quality, ultra-freshly roasted coffee no matter where you live. At half the price, too. The secret is to roast your own, and you wouldn’t believe how easy it is.

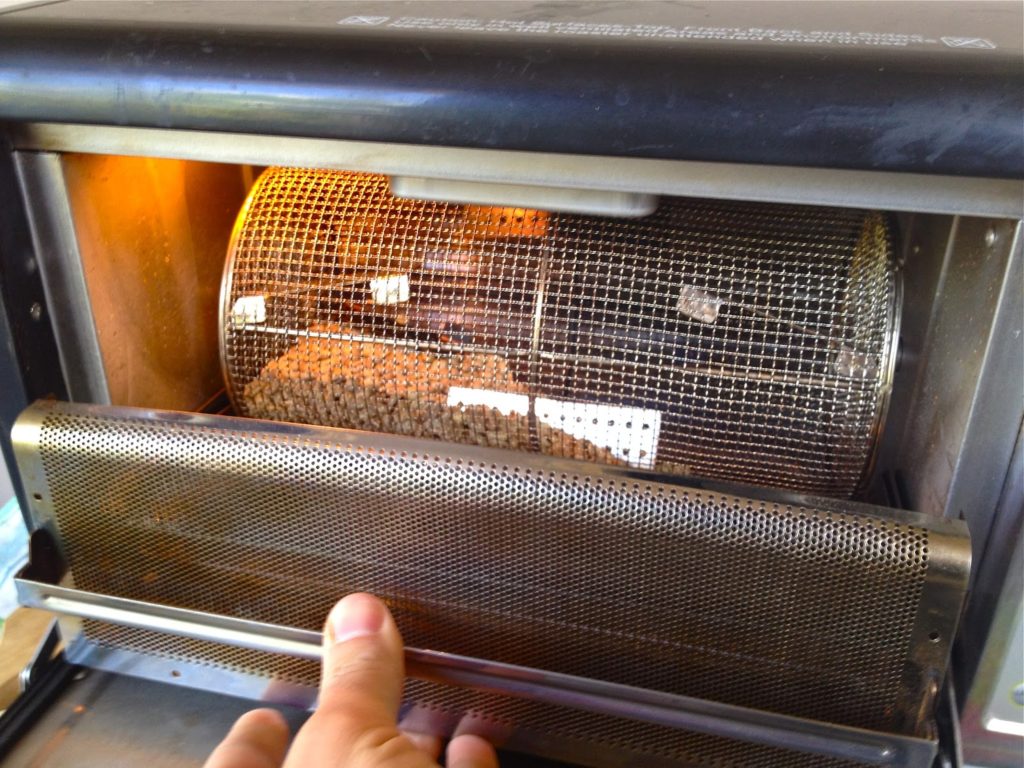
I started with an old air popcorn popper (yours will work if it has side vents as opposed to a mesh vent on the bottom) and I eventually went a little further down the rabbit hole and bought a drum roaster. It’s called a Behmor, it’s the size of a toaster oven and it’ll only take a few months for it to be worth the $300 you’ll spend. A half-pound batch takes less than 20 minutes. Home-roasted coffee makes a great gift, too.
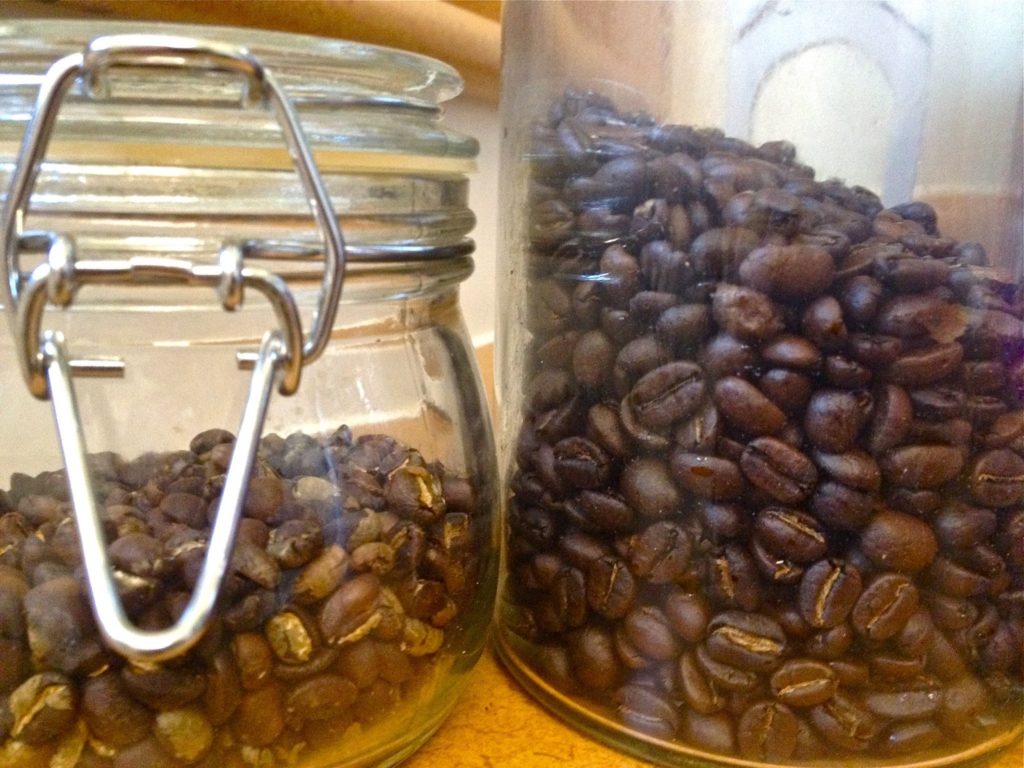
I roast mostly for espresso and espresso-based milk drinks. Every morning when I’m not on the road covering the Giants, I start out with a cappuccino and a macchiato. Sometimes I’ll use the pre-formulated espresso blends that I receive from an incredible “green coffee” mail-order company in Oakland called Sweet Maria’s. But I have even more fun experimenting with single-origin espresso, roasting the green beans to different levels to see what works or combining them to create my own blends.
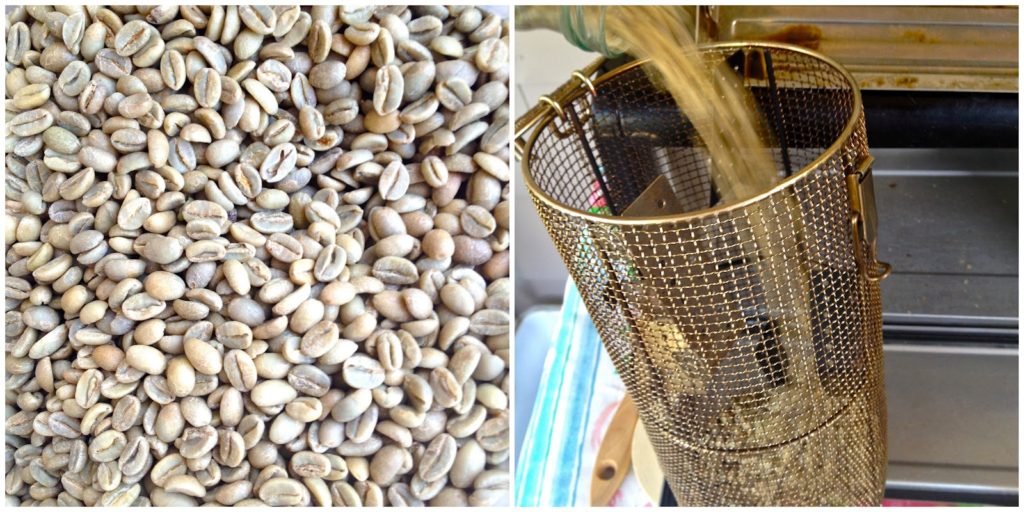
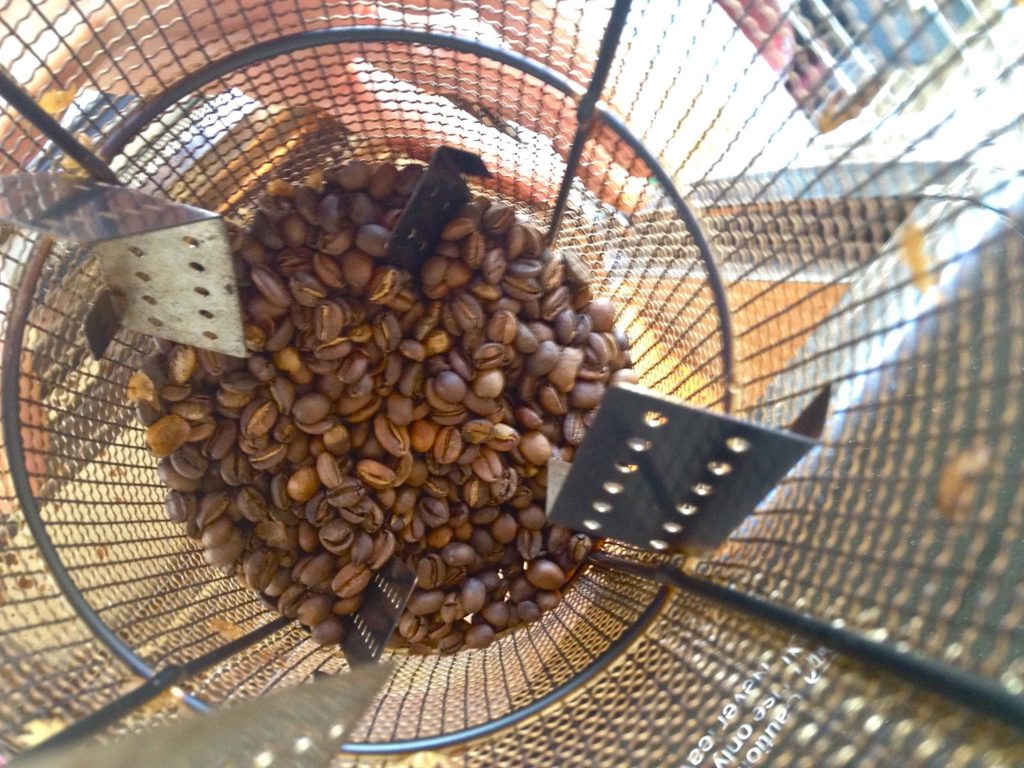
When you roast coffee, there are several cues that help you gauge where it’s at. Smell and color are important. (The beans turn from pale green to straw yellow to tan to brown to dark brown.) But the most informative cue is sound. The beans expand as they heat up, the water inside them turns to steam, and just like popcorn, they pop. The “first crack” tells you that the coffee is at or near “city roast” stage. After the popping subsides, another minute or two will pass and then, if you’ve decided to continue the roast, you’ll get to “second crack.” This one sounds less like popping and more like the softer sound of Rice Krispies in milk. If you keep going to a “rolling” second crack, you’re well beyond a “full city” roast and you’re venturing into Vienna roast and beyond. In my drum roaster, going much further than this stage puts you at risk for a fire in the chamber. That’s because the papery chaff that has separated from the coffee can ignite if too much of it touches the heating elements in the back of the unit. So the Behmor is definitely not a “set it and forget it” kind of deal.
One key point: Espresso roast is NOT always dark roast! You’ve probably heard that the surest way to get the worst piece of meat in a restaurant is to order it well done. Well, the same can be true for coffee. Carbony, oily, dark coffee (generally beyond Vienna and into French or beyond) can be intentionally roasted that dark to disguise defects in cup character. (Hi Starbucks!) The darker you roast, the more you eclipse the “origin” character with “roast” character. And I don’t know about you, but I like to try to taste where my coffee is coming from and how it was processed. It traveled a long way to get to your cup, after all. It came from exotic places like Costa Rica or Bolivia or Sumatra or Kenya or even Kona. How boring would it be if all of it tasted the same?

So my advice is to be open-minded to lighter roasts. If it’s top-quality stuff, you might be surprised at the greater nuance of flavor, the bright, citrus acidity, the malty, biscuity character or the peppery sweetness you will encounter.
(My absolute favorite is a good quality, dry-processed coffee from Ethiopia. When a coffee is dry processed, it means the coffee cherry is allowed to dry in the sun before the seeds, or beans, are extracted. The beans can take on an incredible fruited flavor. When I get a good, clean batch of natural Ethiopians, and roast them to the right stage, they smell amazing – like blueberry waffles!)
For me, espresso is the highest art form of coffee and it’s a never-ending challenge to try to control every variable that goes into crafting a perfect espresso drink. That means getting the roast and blend right, if you choose to start there. But even if you buy an amazing and consistently great roasted blend (like Sweet Tooth from Ritual), it’s still a fight to control all the variables that go into the brewing process. Those include grind, dosage, tamping pressure, water temperature and brewing pressure. Some machines are easier than others to control. Mine is an Isomac Venus, which is a single-boiler hunk of stainless steel that is a little more temperamental. But I find it a lot more satisfying to use than the super-automatic machines where you just hit a button. Who wants to make a McCafe?
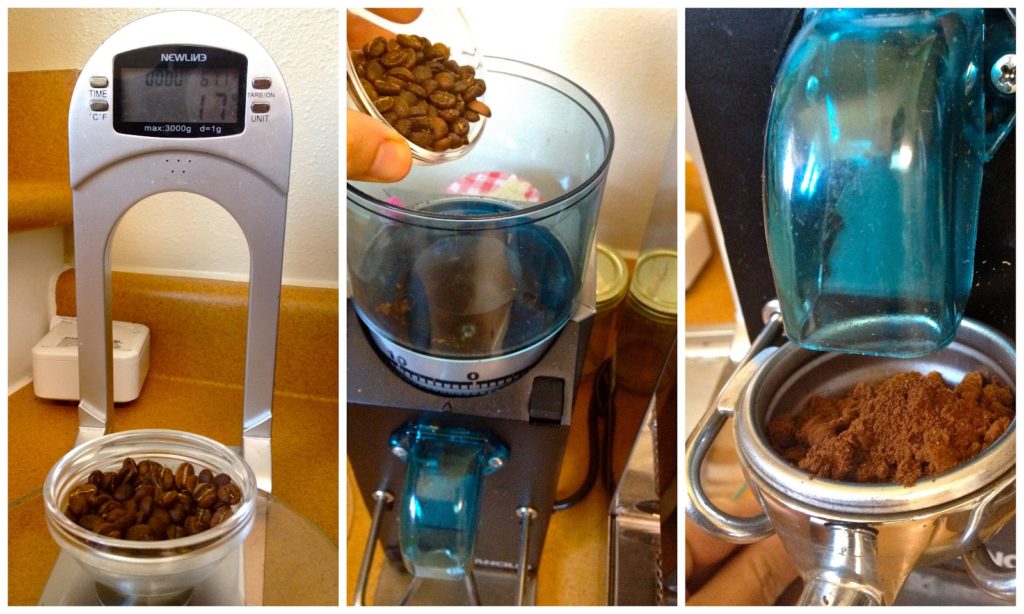
I start out by using my kitchen scale to measure anywhere from 16 to 18 grams of coffee. Then I run it through my Rancilio Rocky burr grinder into my portafilter basket. (A good grinder is just as important an investment as a good espresso machine. A blade grinder simply won’t pulverize the coffee fine enough, and my Rancilio can be adjusted – stepped up or stepped down – as needed if the shot is pulling too quickly or too slowly.)
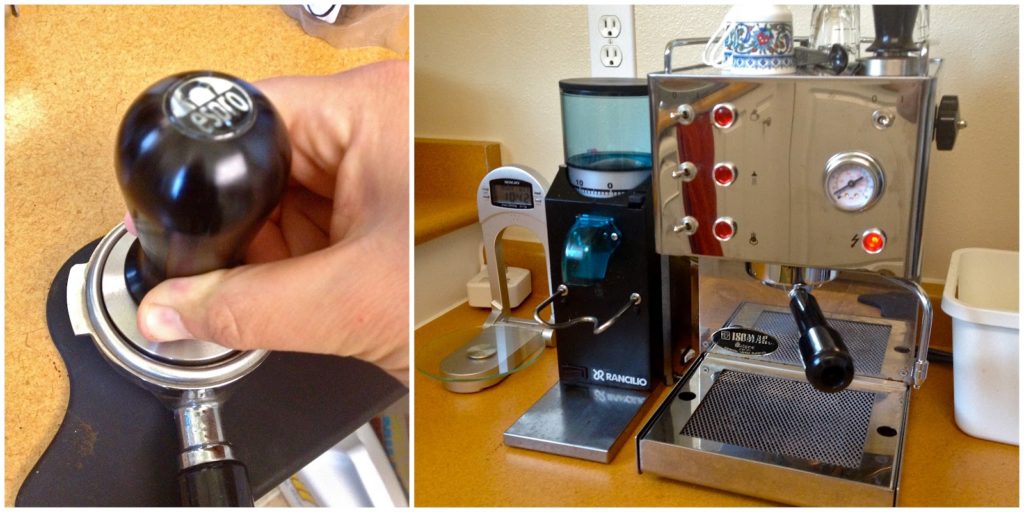
It’s recommended that you tamp the ground coffee with the same amount of pressure every time. That way, you remove one more variable from the process. My tamper is spring-loaded to deploy at 35 pounds of pressure so I know I’m doing the same thing every time. Two quick tamps, and then I’ll brush any loose grinds off the rim of the portafilter. One more light tamp to “polish” the puck and it’s ready to be loaded into the grouphead.
When the red light goes off on my machine, I know the boiler is hot enough to brew. But I’ll try to make sure the temperature is exactly right by flushing the grouphead before I load the portafilter. (This is also a good time to pre-warm your cups with some of that hot water.) When the red light goes back on, my Venus is telling me that she is coming back up to temperature. When the light goes off again, the sensor is telling me that the temperature is pretty much ideal. So I’ll immediately hit the brew switch.
 A well-executed double-ristretto shot, which is roughly 1.5 ounces, should take around 18-22 seconds. If it’s gushing out way too fast, I’ll pour it out and try again, adjusting dosage or the grind. Under-extracted espresso never tastes good. Usually, over-extractions don’t, either.
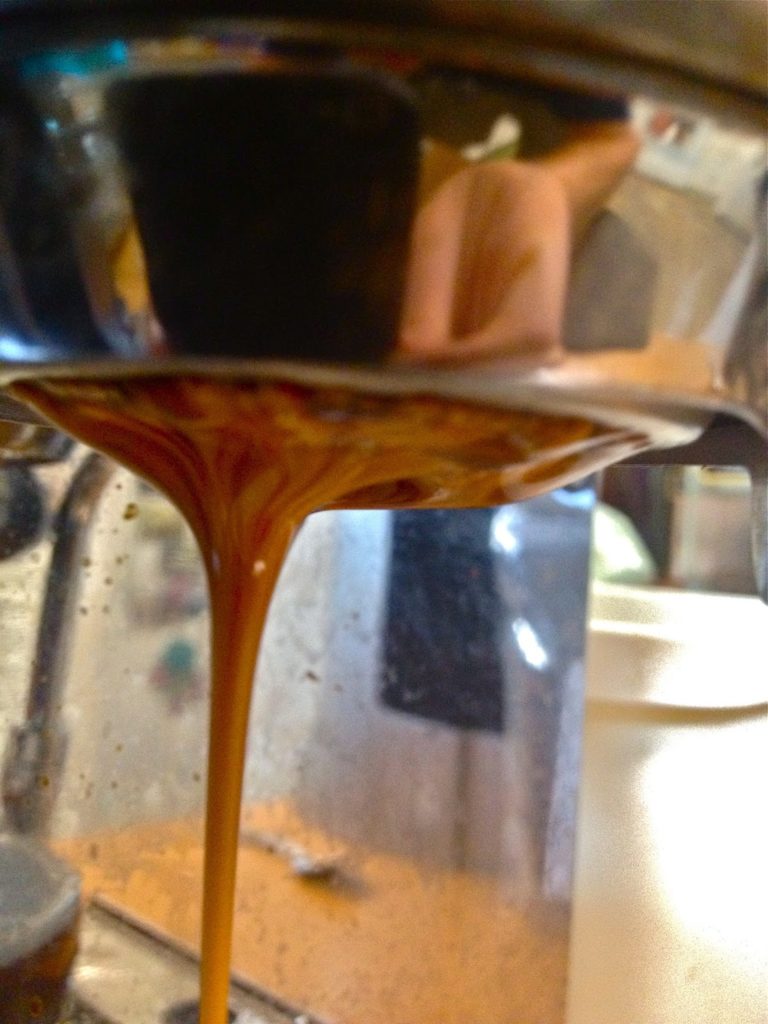
Pulling the shot is where magic and mystery intersect. I use what is called a bottomless portafilter, meaning it doesn’t have a spout or a double-spout underneath the basket. It’s just the mesh screen and nothing else. I like it because I can look at the coffee as it’s being extracted. If it’s coming out uneven, I know my tamping pressure was uneven. Or if it’s turning “blond” too fast, I know the temperature might have been too high. Plus it’s just so awesome to watch a really good, thick, syrupy, tiger-striped shot come pouring out in thick globs.
If you’re just drinking a shot of espresso, stop here. You’re ready to enjoy it. But if you want to create a latte, cappuccino or macchiato, you’ll need to switch into milk-steaming mode.
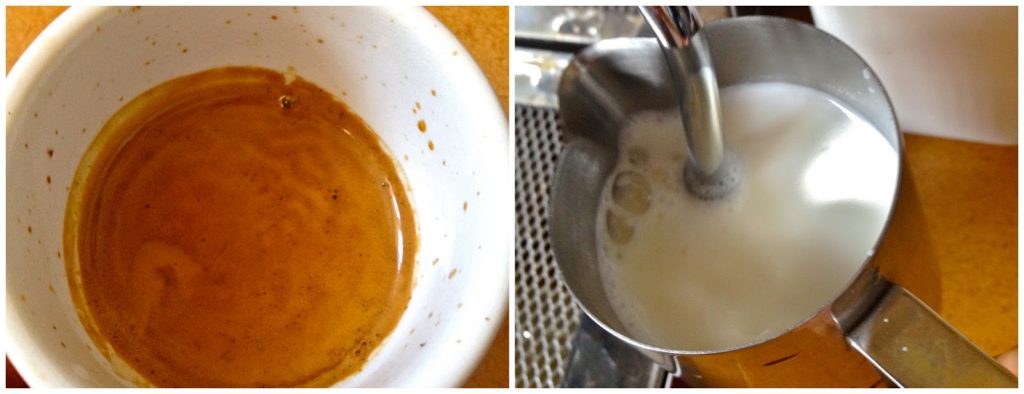
Precision is just as important here. The goal shouldn’t be to foam milk but to “stretch” and “texture” it. When milk is steamed correctly, even if it’s skim, it not only improves the drink’s texture. The protein strands elongate and the lactose adheres to it. Literally, it becomes sweeter. (Likewise, thin milk or what I call “dishwasher suds” will make your drink taste weak and unpleasant.)
I’m still hit-or-miss when it comes to perfectly texturing milk, and I’ve done it a thousand times. Suffice it to say the key is to keep the tip of the steaming wand just barely submerged and to try to create a “whirlpool” effect. It’ll take practice. A lot of people use a thermometer to make sure they don’t overheat or scald the milk. I just keep my palm on the underside of the pitcher, and when it gets to the stage when it’s barely too hot to hold, I know it’s just right.
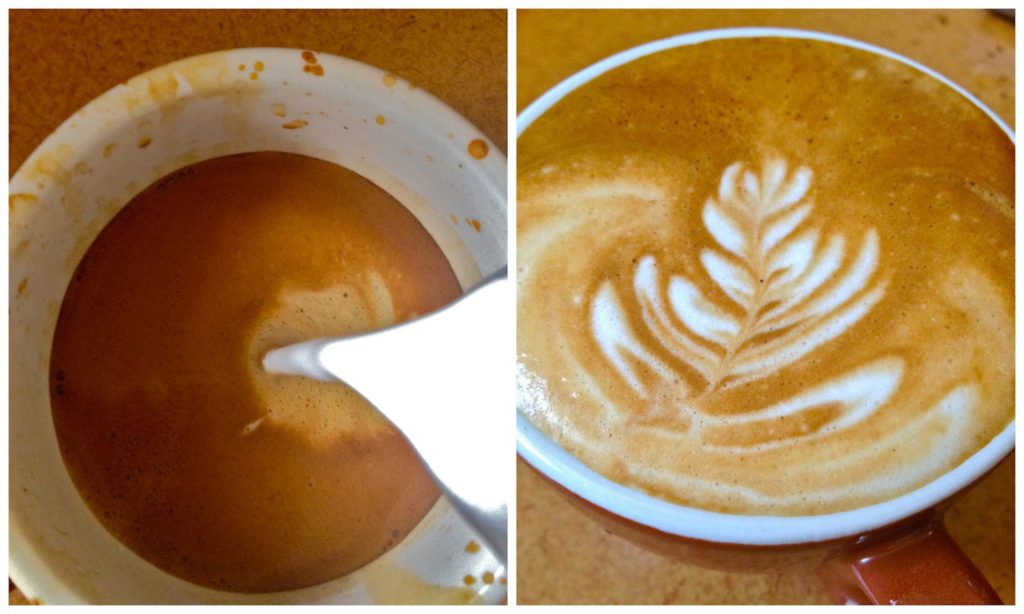
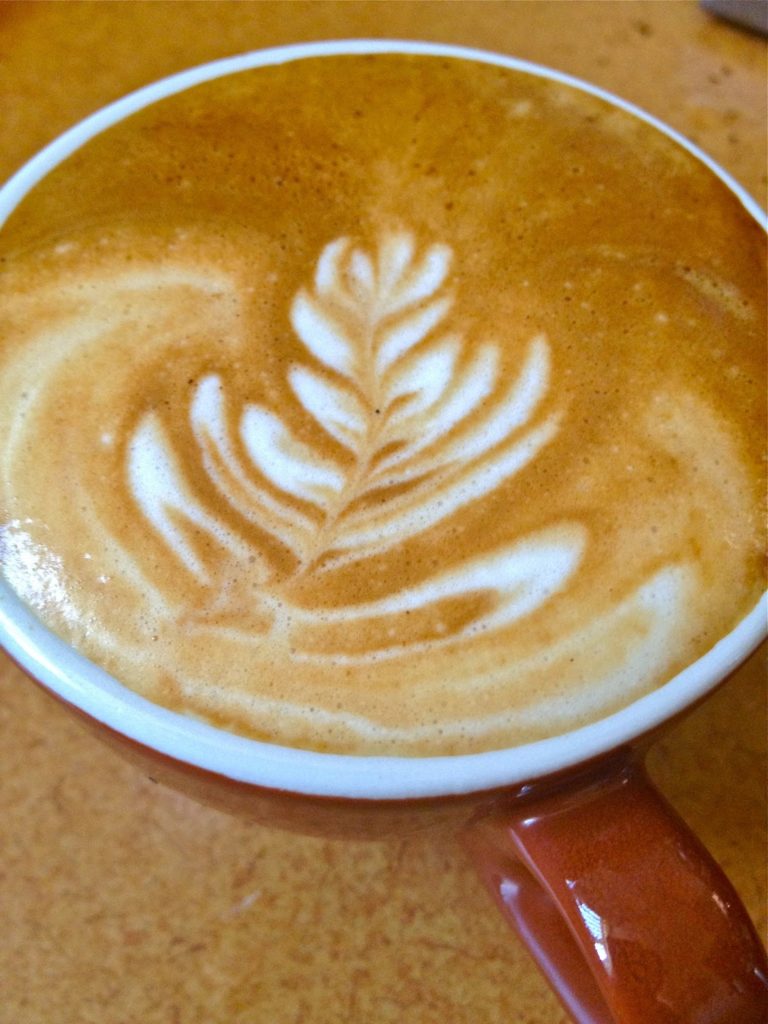
If you’re lucky (or really skilled) and the milk is properly textured, you can give the pitcher a swirl and a few good knocks on the countertop to break any small bubbles, and then you’re ready to pour latte art. It takes a steady hand and a little wiggle at the right time. As I mentioned, my first four attempts at a classic rosetta leaf weren’t so photogenic. I make a lot of unintentional sea creatures.
But however the design turns out, you won’t need a nap. Especially if you drink five of them!

Rhonda
May 5, 2012 at 11:46 pmNow I want to go coffee tasting with Baggs!
James
May 6, 2012 at 12:06 amHaha – Like a true Oregonian. Well done. You write well about non-sports topics as well.
Unknown
May 6, 2012 at 12:08 amAgreed. Sippin a latte and talking baseball with baggs… Would be perfect.
Anonymous
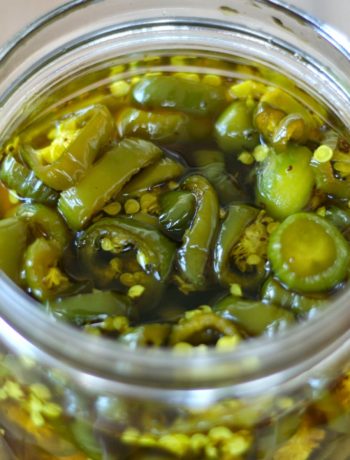
May 30, 2012 at 4:20 amI've recently discovered roasting my own coffee. Due to space limitations, I am using my popcorn air popper. It gives good circulation of the beans. It's a little but I roast for 3 mins. (1st crack), rest for 3, then roast to the start of the 2nd crack (about another 3 mins. I've only been roasting my regular coffee for the drip machine; but next time I'll try roasting for espresso. Perhaps a little darker than your photo above, with about the same distribution of lighter and darker roasted beans. Tastes great! Can't get any fresher!
I'll have to try dry-processed beans; it makes sense that they would have additional flavors from the drying/fermenting process. Then maybe onto those beans that are processed in the digestive system of those cat-racoon animals. 🙂